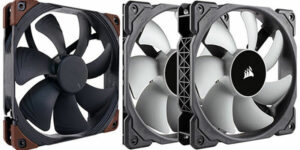
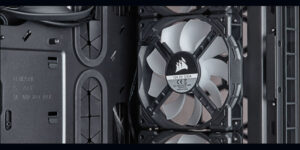
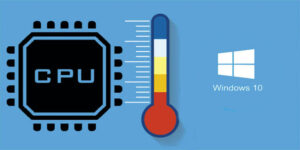
If you’ve ever found yourself frustrated with SpeedFan not detecting your system fans, you’re not alone. Whether it’s the AFOX motherboard with a noisy CPU fan, Be Quiet pure wings 2 PWM fans causing a blank display, or a Gigabyte GA-Z170-Gaming-K3 motherboard perplexing user Giancarlo456, issues with SpeedFan are widespread and multifaceted
In this post, we’ve discussed simple remedies for SpeedFan not recognizing fans issues. So, if you can’t see the fans or the CPU temperature, modify the fan speed, and this post will be quite helpful.
Why SpeedFan Doesn’t Detect Fans?
In the quest for quieter and more efficient cooling, users often encounter difficulties with SpeedFan failing to detect their fans. Outdated software, compatibility issues with specific motherboards, and limitations within the BIOS contribute to this common problem.
Read Also: Fixed: iCUE Not Detecting Fans or any Devices
How To Fix SpeedFan Not Detecting Fans on the Laptop and PC
If you download SpeedFan and notice it’s not finding your CPU fan, try updating SpeedFan or your computer’s BIOS software. If you’ve already updated them, check if your motherboard works with this tool.
Here are some easy fixes for the SpeedFan not detecting fans problem:
1. Configure SpeedFan
If SpeedFan isn’t identifying your computer’s fans and you’ve tried increasing the fan speed without results, try the troubleshooting methods below. However, before going, make sure that SpeedFan is compatible with your motherboard.
- Open SpeedFan and choose the Configuration option.
- Navigate to the Advanced tab.
- Click on the chip in this tab to reveal its location.
- Select your motherboard from the options offered. This will disclose the motherboard details.
- Now, pick PWM 1 mode, click “Set To” in the bottom right corner, and select “Software Control.”
- Repeat the method for PWM 2 and PWM 3 modes.
- Click the OK button to save your changes.
2. Make sure your SpeedFan and BIOS are up to current.
In the event that your CPU or case fans aren’t being detected by SpeedFan, try the solutions provided below.
Make sure the software is up to date:
- Check that you have the most recent version of SpeedFan on your PC. Check for updates and, if there is one, install the latest version.
Look at the BIOS settings:
- Start the BIOS application on your computer.
- Look for the choice that reads “Use temperature input for fan control.” You might want to try alternative BIOS software if it’s not there.
Update the BIOS:
- Check to see if you have the most recent version of your BIOS app. To get the latest BIOS upgrades, go to the website of the business that created your motherboard.
Check for Compatibility:
- Check to see if the newest software upgrades, such SpeedFan and BIOS, are compatible with your motherboard.
Turn on your BIOS system:
- Turn off the CPU fans in the settings. Select the Power tab.
- Click on the Power tab.
- Go to the “ACPI” option for suspension type.
- Change the settings from S3 to S1.
- As your custom default settings, save the modifications you made.
- Press F10 to get out of the BIOS system.
3. Think about what the motherboard can and can’t do
Keep in mind that some motherboards, like the Gigabyte GA-Z170-Gaming-K3, may not be able to change fan speeds at all. Look for a label on the motherboard that says it can change the speed of the fans.
4. Disable Fast Boot
As suggested, experiment with disabling fast boot to observe any changes in fan detection.
5. Download The Alternative Software
Look at other fan control programs, such as FanControl. Check to see whether other software can find and control the fans well.
How To Fix SpeedFan not Changing Fan Speed
Just installing SpeedFan and pushing the UP arrow won’t make your PC’s fan run faster. That means you have to set up your computer.
- Simply click the Configuration button, then select the Advanced tab.
- Now, choose your motherboard chip from the drop-down selection.
- Here, you should see PWM 1 mode, PWM 2 mode, and PWM 3 mode.
- Click on any of them and select Software controlled.
- Tick the Remember it box and hit OK.
- Exit system configuration tool
- Now try to change the fan speed using the Speedfan by pressing the UP or DOWN arrows
Read Also: What Should Be the Ideal CPU Fan Speed While Playing Games?
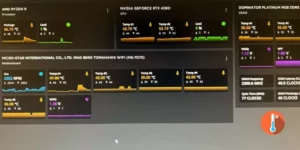
How To Fix SpeedFan not Detecting CPU Temps
There are motherboards that don’t have temp sensors so it will be difficult for SpeedFan to get info on CPU temps without these sensors.
However, if your motherboard is compatible and the CPU temperature is still not seen, perform these steps:
- Open Speedfan on a Windows 10 PC
- Go to Charts and select Temperature from the drop-down menu.
- Make sure all the checkboxes are checked within the charts tab.
- Now go back to the Read tab and you will see core temps.
Bonus Tips & Tricks To Fix Simple Solution for SpeedFan, not Working
If the remedies above don’t work, try uninstalling SpeedFan and then reinstalling it. Also, make sure that your BIOS is completely up to date. You also need to make sure that SpeedFan program works with your motherboard.
If all go green then you should be able to solve any problem that you may face with SpeedFan.
However, it’s not the end of the world, you can always choose the best alternate CPU temperature monitor if you want to check your PC temperature.
This is how we addressed the difficulties with SpeedFan not working on Windows 10 and 7. Please leave a comment if you have any ideas.